There are a few things we try to make sure our contributors are informed about when they are drafting articles inside WordPress.
Quick Links:
- Profile
- Subtitle & Excerpt
- Headings
- Images/Writing Alt Text
- Mentioning titles by name
- Categories
- Reviews Pros & Cons
- Content Warnings/Info Boxes / Spoilers
- Credits, Disclaimer, Special Thanks
- Always Preview Your Post
- Checklist for Writers
- Checklist for Editors
Profile
As a first-time user (or if you simply have never gotten around to it), you should:
- Go ahead and fill out your profile with a bio, social media links, etc.
- To add an avatar, please create an account on Gravatar with the SAME email you use to access this site. If you already have a gravatar/Wordpress.com account under the same email, then you can ignore this.
Doing so will display your author box at the end of your article(s), letting people know a little about you and where to find you elsewhere on the web!
Subtitle and Excerpt
Your article needs a subtitle and excerpt, which you can find the input boxes for as you scroll past the content post area (see reference image below). If you do not see the “Excerpt” section, scroll up to the top of the edit screen and hit the “Screen options” tab on the right-hand side. This will show you checkboxes to show/hide various boxes on the edit screen. Click “Excerpt,” and it will then be available to you.
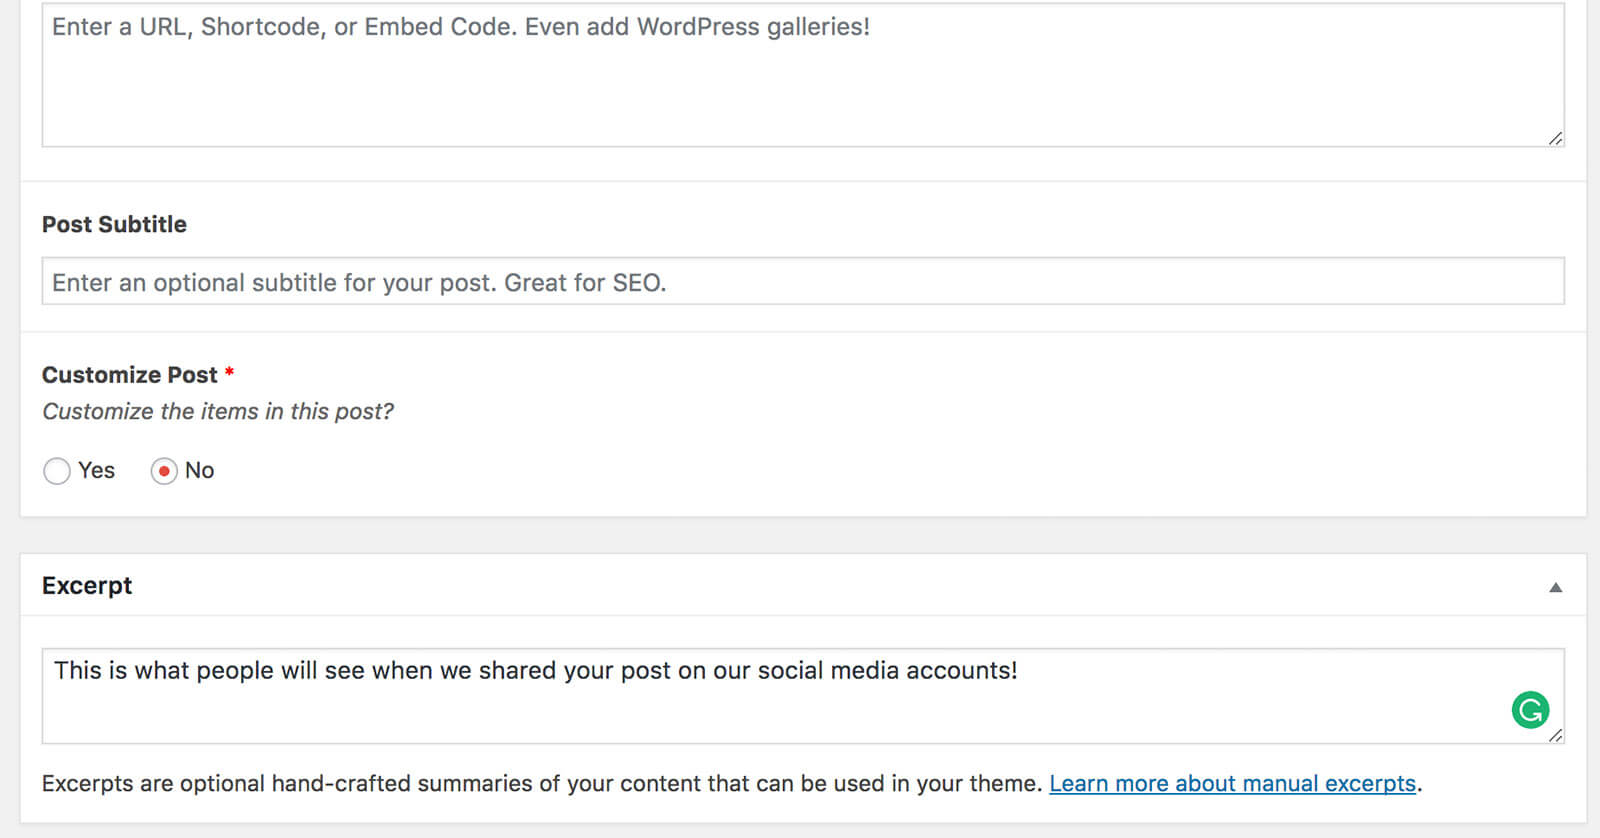
The difference between a subtitle and an excerpt is best explained as such:
- A subtitle is a short, custom sentence meant to entice people who are already on the article to read it. We suggest not using your name, but rather talk in first person (not third person please) if you choose to mention yourself, as the reader is already on the page.
- An excerpt is also a custom sentence, but a summary of your article. It is used mainly when your article gets shared elsewhere, such as Facebook, to entice people to follow the link to read it. In those instances, we suggest you use your name or refer to yourself in the 3rd person, if you need to mention yourself. Format: *name* reviews *title*, *short explanation of content*, from *publisher* (ex: Anne reviews Yankee & Carameliser, the latest food-themed boys’ love manga from Yen Press.). Max length is 155 characters long.
Headings
Header tags are what keep your content visually organized and create accessibility landmarks. They help your readers understand your writing, they help search engines determine your content.
Heading hierarchy refers to the structure and order of the ‘H’ tags in HTML, ranging from H1 (highest level) to H6 (lowest level). Each tag signifies a different degree of importance within your content. The H1 tag is typically the main title or heading, while the H2 to H6 tags serve as subheadings, breaking your content into more digestible sections.
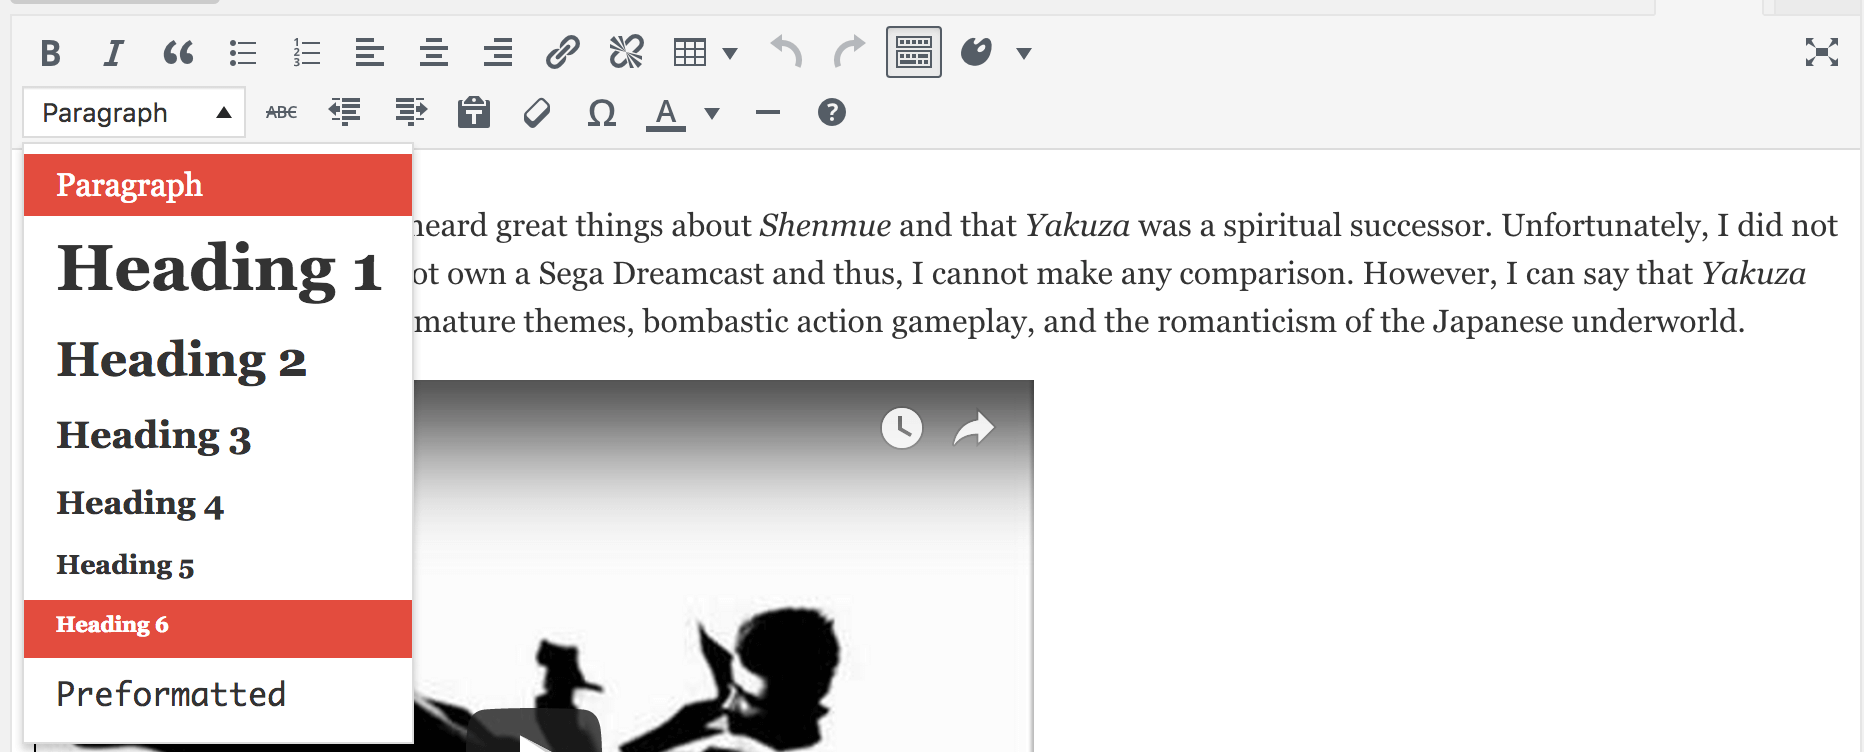
- For Headings, be sure to use the Heading tags to break up your article into sections. DO NOT BOLD the heading text, as that will automatically be applied.

- Never use Heading 1, as that is reserved for the titles on the page only. You should use headings starting at Heading 2 and below, depending on how you are breaking up the sections of your article. (ex: All main headings should use Heading 2, subheadings inside that section should use Heading 3, any subheadings under that Heading 4, etc). Most of the time, you will never need to use past Heading 2 or 3.
Images
- Generally speaking, all uploaded images should be at least 800px in width (wallpaper size). This can vary on a case-by-case basis, but if needed, try sizing down your images before uploading them. Please do not upload images larger than 500 KB. Resize down.
- When uploading images, make sure they are in the JPG format. Mac screenshots, by default, save out as PNG files, which are a larger file size and unnecessary for use in the articles. Also, just renaming the file extension does not change the format it is saved as.
- When inserting your images, please use the Large or Original/Full size version. The site is coded to automatically center and format the images to fit the content.
- If an image is taller than wide, like a manga cover, please insert the image at its original size. THEN click on edit image, custom size, and set it to a range of 500- 700px (whatever looks good when you preview the article).
- Make sure to name your images accordingly, such as including the show name/characters/etc (ex: one-piece-luffy-d-monkey.jpg). Just don’t go overboard and make the filename longer than 40 characters.
- PREVIEW YOUR ARTICLE. Check to make sure your images look alright.
- Image alt text is required on all images, except the featured article image.
Writing Alt Text on Images
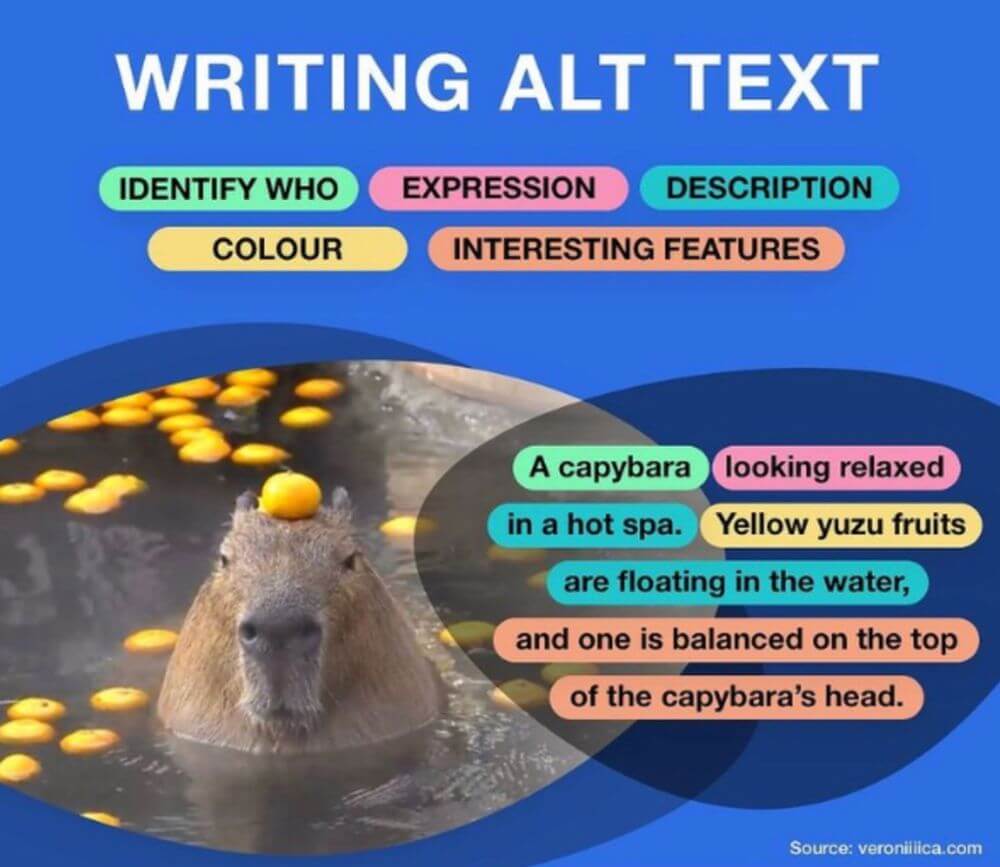
- It is required to fill out the alt text for each image you upload. Alt text is used by screen readers to explain what the image consists of, different than a caption, so if there is important information or text only in the image, you should include it in the alt text.
- Captions can be used for images, but are not required.
Featured / Main Article Image
- Don’t worry about adding a featured image to the post, as Katy will handle those herself. If you have a specific photo in mind to use for the featured image, simply let her.
Mentioning titles by name
When referencing a title of a show or book in your article, our preference is to italicize the name of the item. However, if it’s inside something that is already italicized, such as the caption text, then you will want to put quotes around the name to distinguish it.
Categories
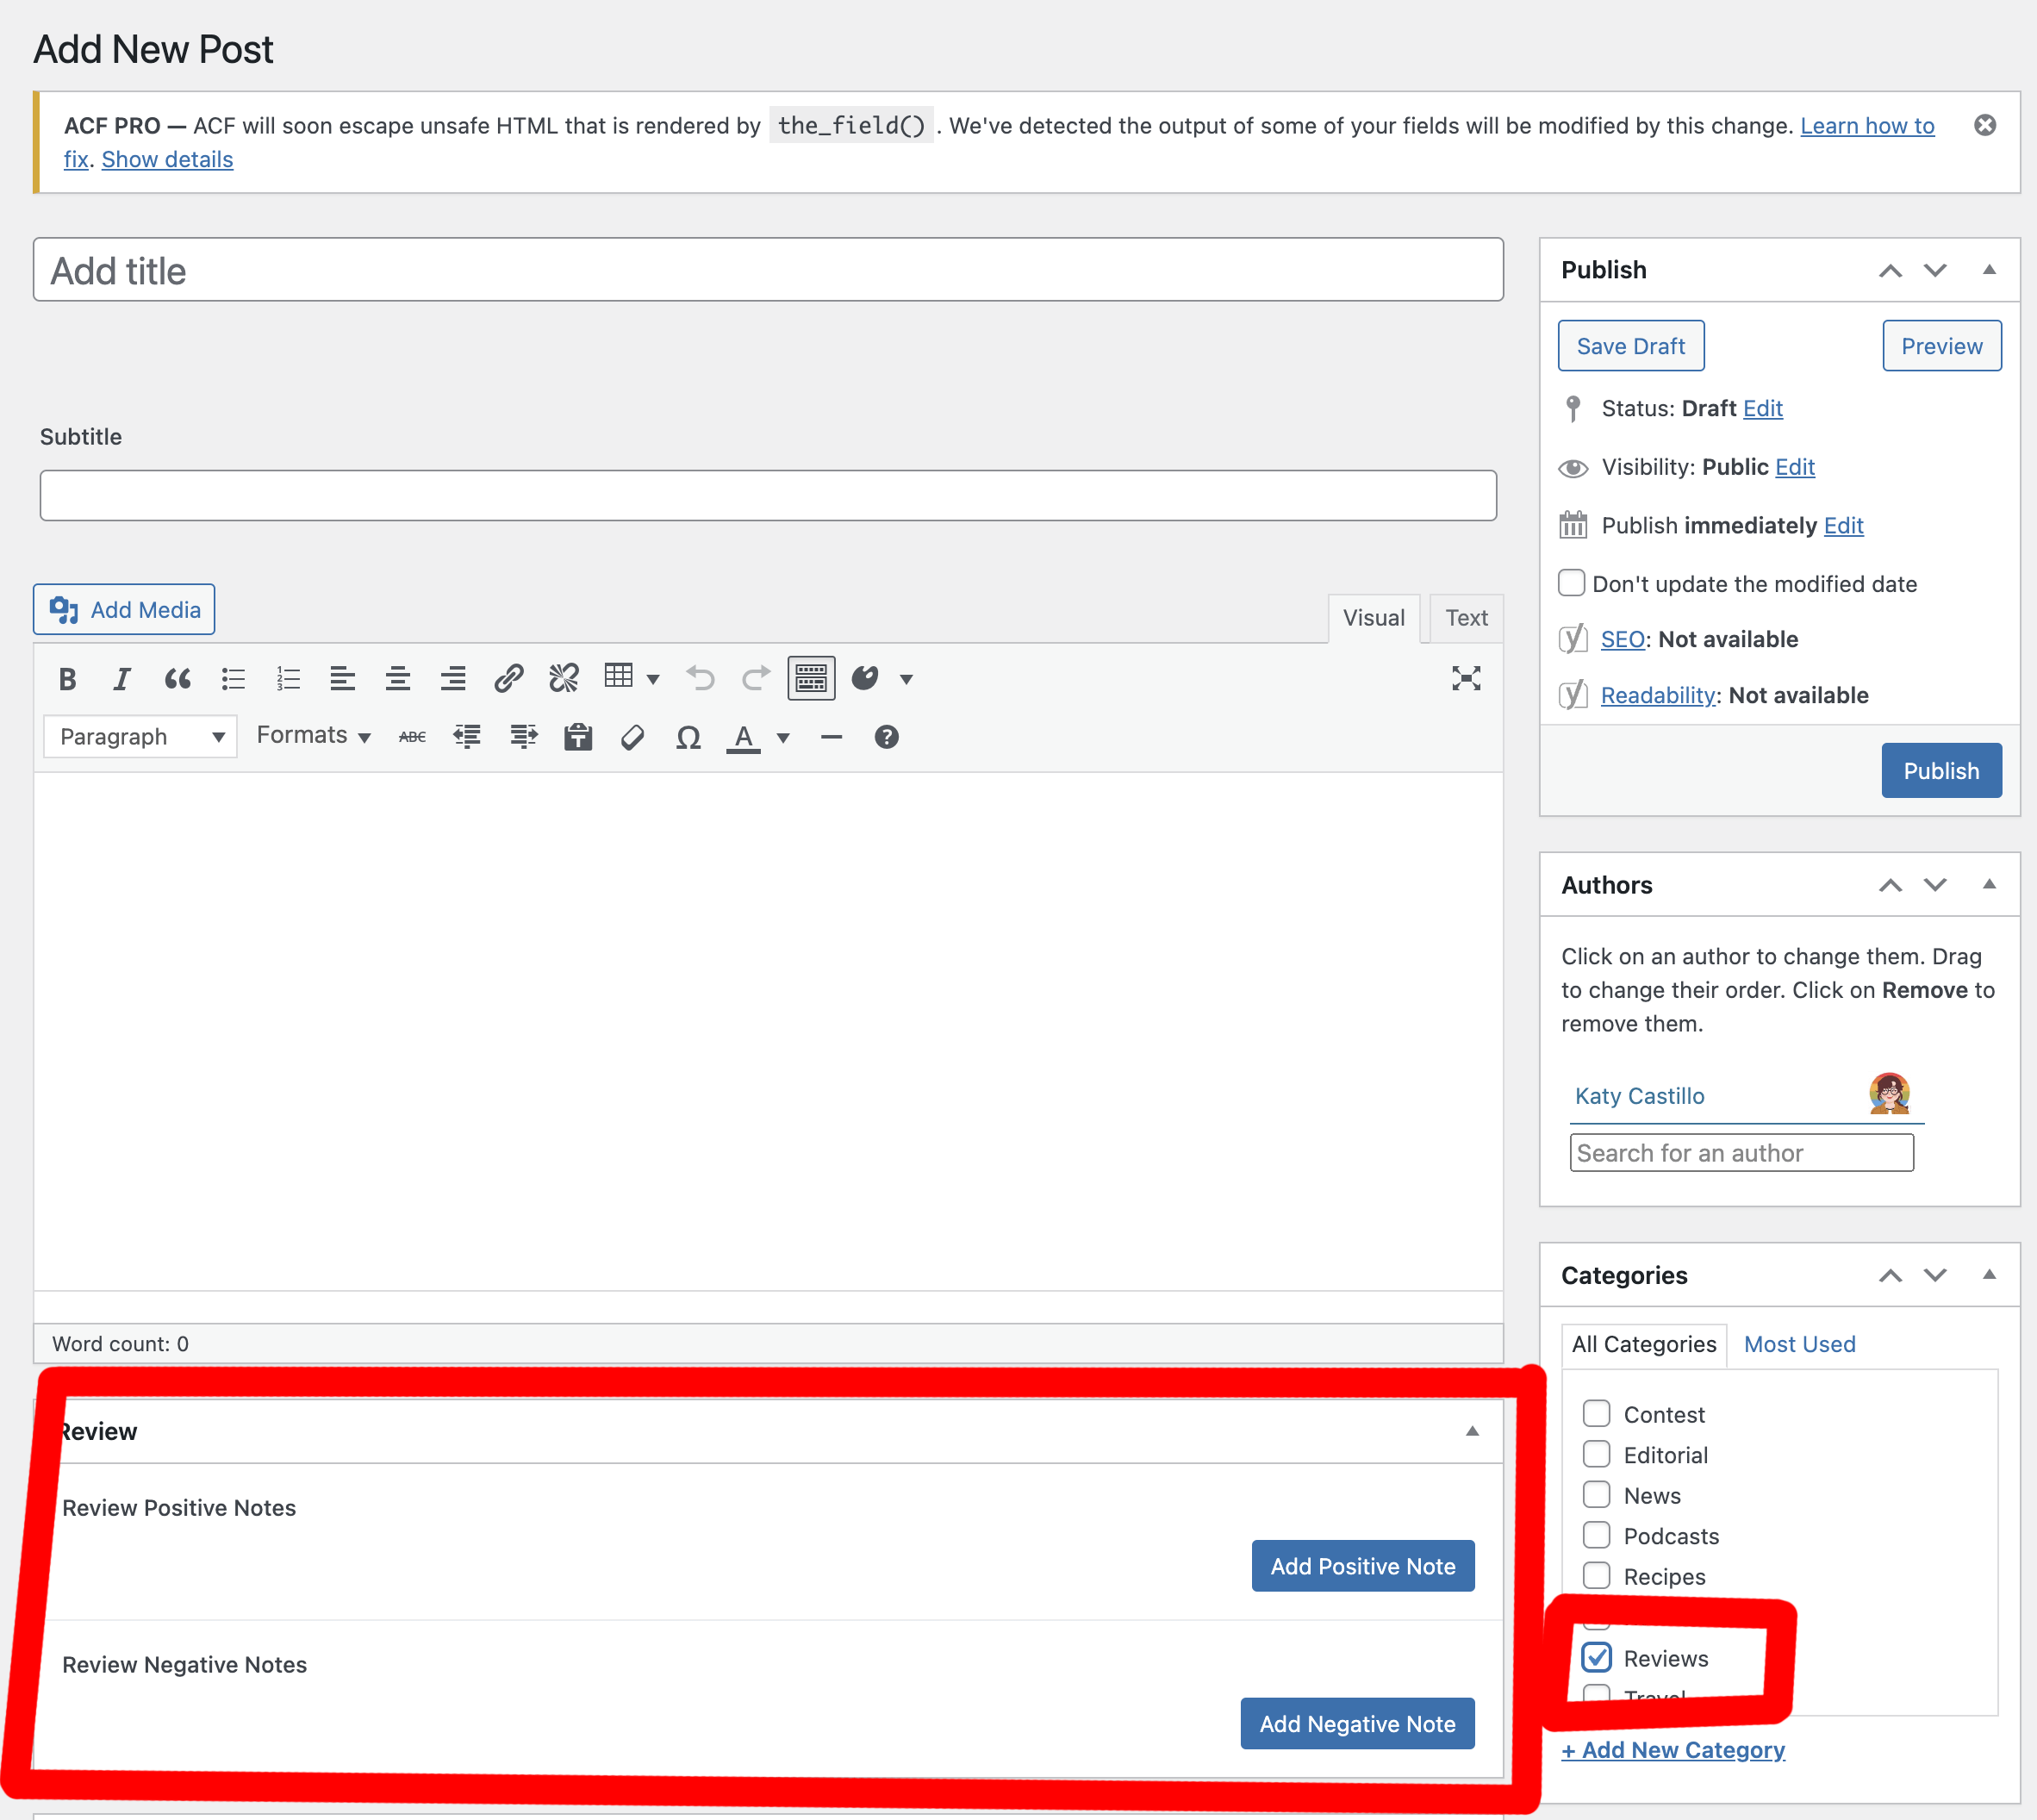
All articles need to be assigned a category (only 1), and not be left to the default of “Uncategorized.”
- It should be fairly obvious if your article is a Review, Recipe or Podcast, so mark those as needed. Most other articles will be Editorials, but if there is any confusion or questions about News/Travel, please ask your editor.
- Do not assign tags. Katy will be in charge of doing that.
Review Pros & Cons box
If you’re writing a review and wish to include a pros and cons section, you can find it when you select the Review category on the post, their section will pop up under the main draft area.
Content Warnings / Info boxes / Spoilers
If your article has content warnings and/or spoilers, please use the Format Shortcode.
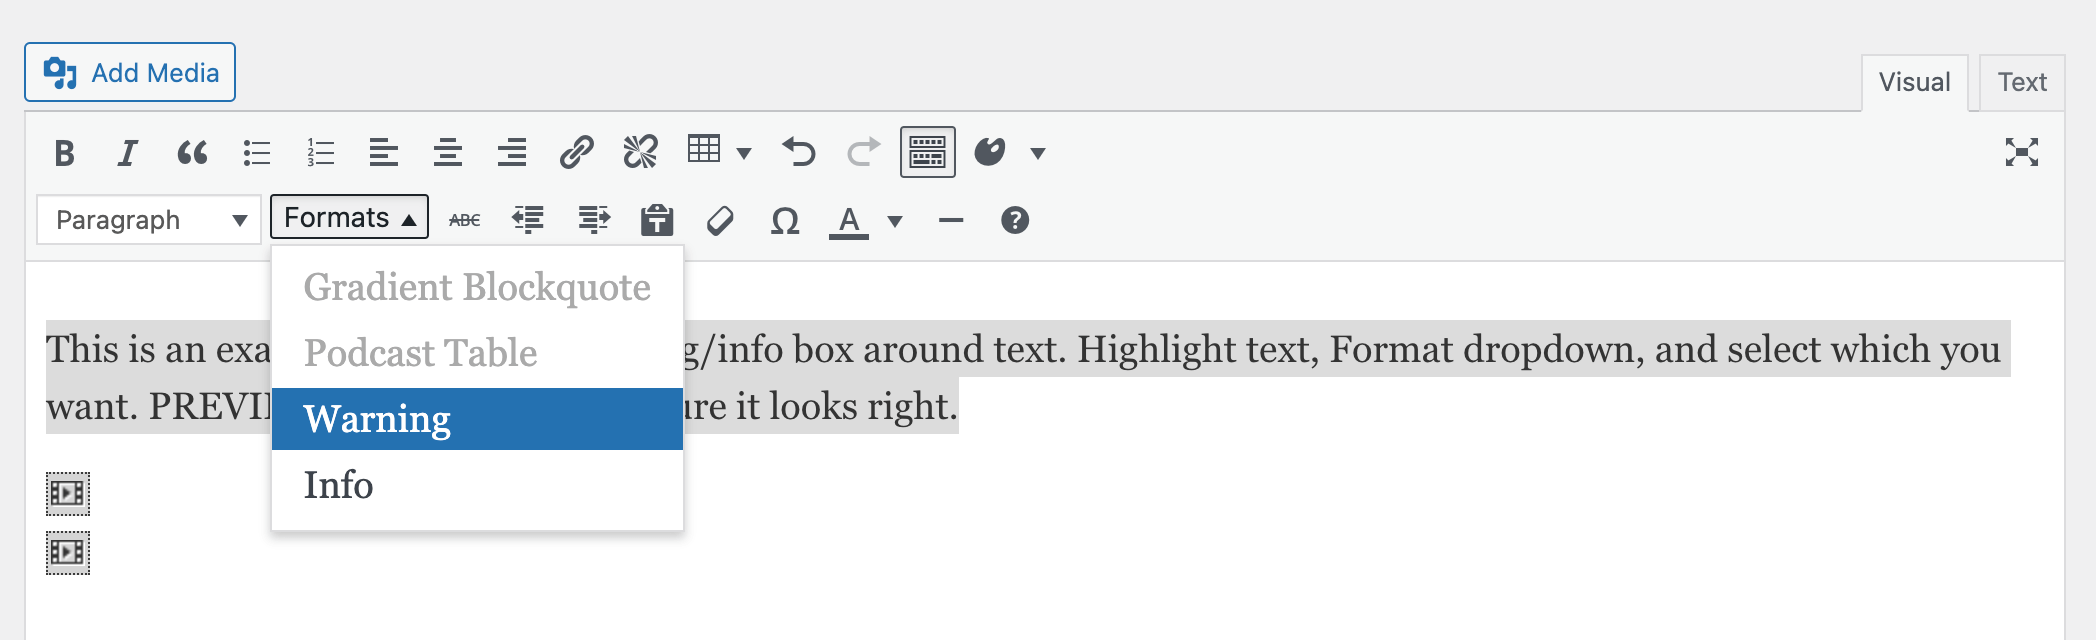
This is an example of a content warning box.
- Select the text, on the menu go to Formats > Warning. On the editing side, it won’t look like anything has changed, but if you preview the article, you should be to see the effects.
The same goes for info boxes. See a live example.
This is an info box. We use this to let folks know where they can purchase stuff.
- Select the text, on the menu go to Formats > Info. On the editing side, it won’t look like anything has changed, but if you preview the article, you should be to see the effects.
Credits / Disclaimer / Special Thanks / Sources
We always try to give credit to folks. At the end of the article, if there are credits of something you’re writing on for like a review, please include them. We also knowledge when we have received something as a review copy or been invited to an event for transparency’s sake. Here’s an example of us giving credit at the end of the article. Please include where to purchase if it is a review or an article featuring a specific title.
Always preview your post
This is the best way to check if there is any funkiness going on. If you’re dropping your text directly from Word or GDoc, <span> tags will be injected into it. Removing these usually fixes more formatting issues. If that still doesn’t fix the issue, please let either Katy or Chris know about it!
Checklist For Writers:
Before submitting your draft:
Headings & subheadings used throughout for accessibility (More info: Headings)
Images have clear, descriptive ALT text. Include images with alt text in the draft. (More info: Images)
Including video or audio, please list the links in the draft & list CW/TW if needed
At the beginning of the article, have a clear indicator of spoilers & Content / Trigger Warnings
Sources, Thanks You, Disclaimers, Where to Purchase, Credits at the end of the article (see Credits)
Subtitle and Excerpt included in draft (More info: Subtitle & Excerpt)
Word count short form 700-1000 your own words / Long-form minimum 1200 your own words (Image alt text doesn’t count towards the word count requirement.)
Uploading Article as a draft to the Site:
Headings & subheadings used throughout for accessibility (More info: Headings)
Images uploaded as .JPGs, not .PNG and file named correctly (More info: Images)
Images have clear, descriptive ALT text. Include these in the draft. (More info: Images)
Content & Trigger Warnings posted at the beginning of the article (More info: Content Warnings)
C&T warnings for video/audio (More info: Content Warnings)
At the beginning of the article, have a clear indicator of spoilers (More info: Content Warnings)
Clear draft of < span > tags (more info: Preview Your Article)
Sources, Thank You, Disclaimers, Where to Purchase, Credits at the end of the article (see Credits)
Subtitle and Excerpt included in draft & post (More info: Subtitle & Except) & below 155 characters
Preview your article and see if it looks right
Submit the article draft to “pending for review”
Message Katy when done
Checklist For Editors:
Headings & subheadings used (More info: Headings)
ALL Images have clear, descriptive ALT text (More info: Images)
Content & Trigger Warnings included (More info: Content Warnings)
C&T warnings for video/audio
Clear indicator of spoilers
Sources, Thanks You, Disclaimers, Where to Purchase, Credits at the end of the article
Subtitle and Excerpt included in the draft (More info: Subtitle & Excerpt) & below 155 characters
Word count short form 700-1000 their own words / Long-form minimum 1200 their own words
Message Adam (Managing Editor) when done & let him know if you need to look at the article after edits are made
If anything is unclear or needs further explanation, please reach out to either Katy or Chris!
Checklist For Katy:
UTM parameters at the end of links
Add editor credits
Add affiliate links