
A big shout out to my FC members who helped me come up with some of these. You guys are awesome!
Final Fantasy XIV has more than just a few strange mechanics and options. While these might be confusing for veterans of the MMO genre, they can be even more daunting to new players. Before you decide to push the game to the side, I’ve compiled a list of tips, tricks, and explanations that should make your trek through Eorzea a little easier.
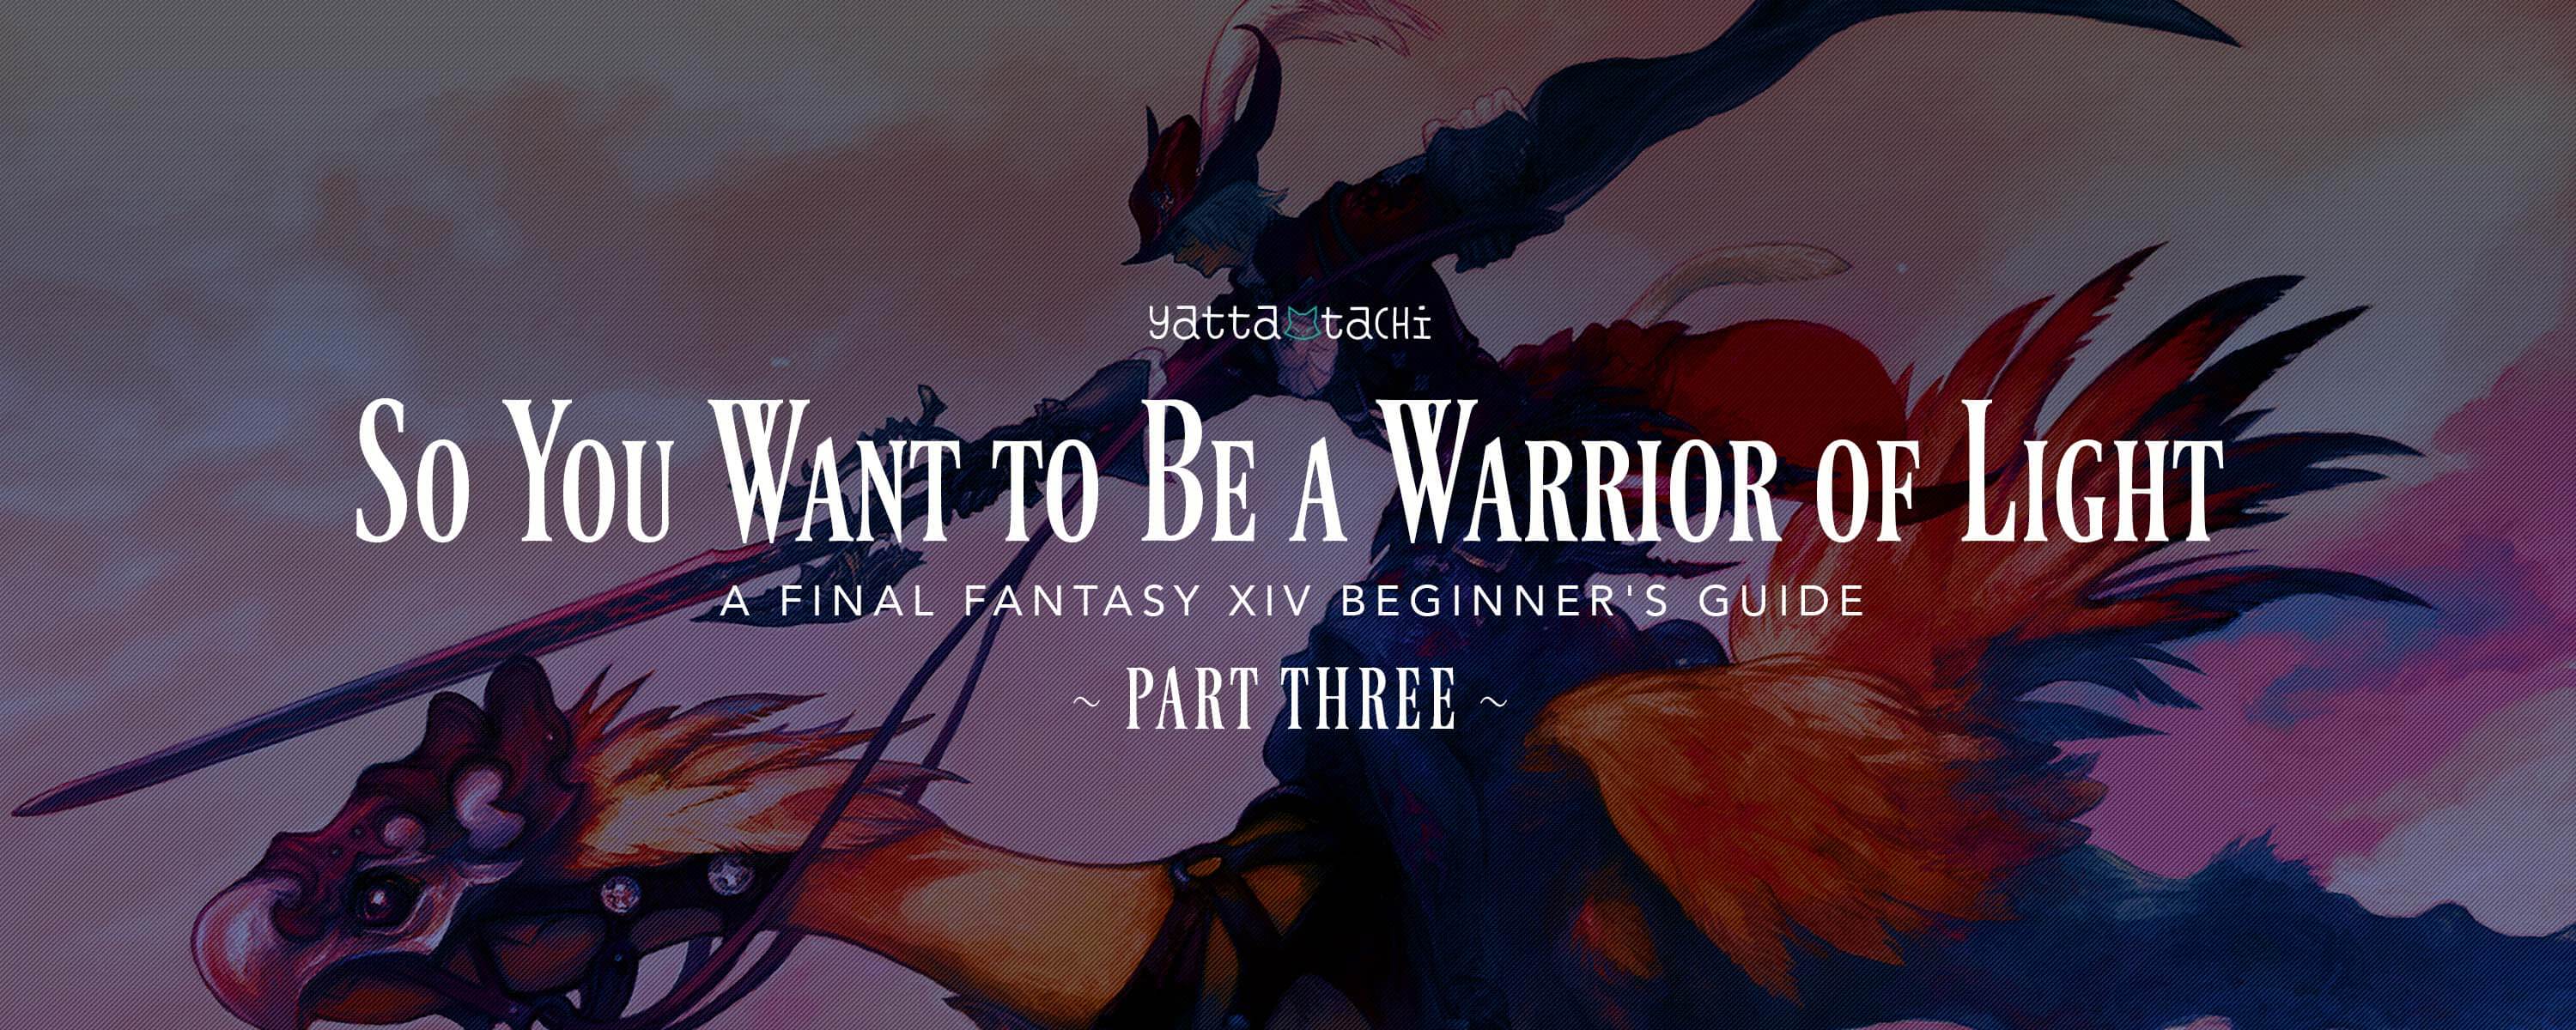
“Shut up and let me drive.”
Tips
Leveling
Whether you’re falling a little behind on levels for the MSQ or you’re working on getting your second class to max level, finding a good way to farm EXP can be a tough task. Not to worry; you’ve got options. The number one best way to gain a ton of experience for little effort is to do your Duty Roulettes.
With a max level class and the story complete you should have the following roulettes: Expert, Level 70, 50/60 Dungeon, Leveling, Trials, Guildhest, Normal Raid, Alliance Raid, and PvP. These roulettes reset each day and reward a generous bonus for completing them on top of what the dungeon/trial/raid would give had you chosen it specifically. While Tanks and Healers may enjoy fast queue pops, the DPS wait can get ridiculous. If your estimated wait time is over thirty minutes, check out the Party Finder or ask people from your Free Company to join you. (More on the Party Finder and Free Companies later.)
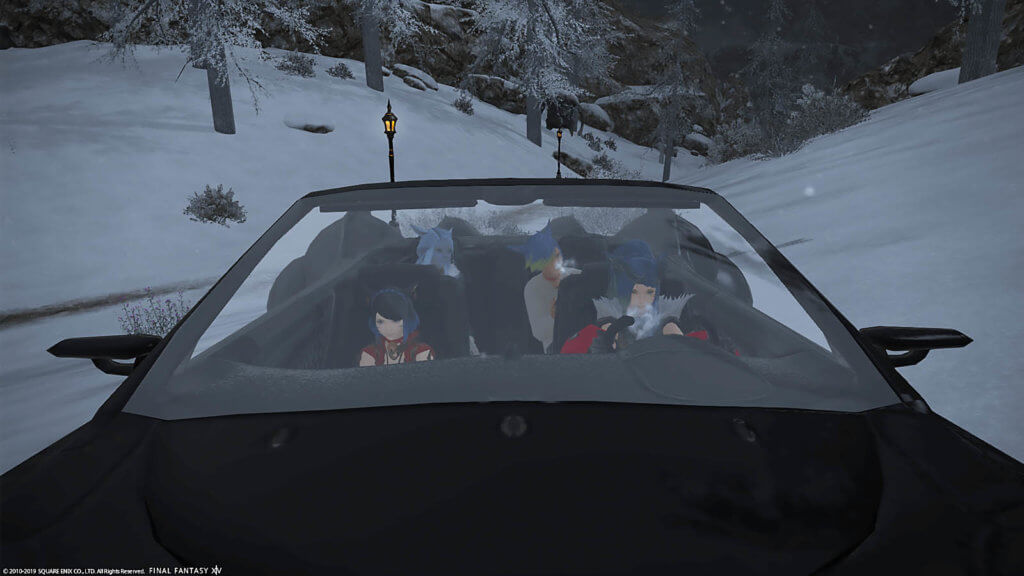
Completed your roulettes but they weren’t enough? Try selling your soul to Deep Dungeons! Palace of the Dead (PotD) and Heaven on High (HoH) will help level you from 1-60 and 61-70, respectively. The unlock requirements for both of these Deep Dungeons are simple, and for some fairly quick runs you can get some decent EXP. The best thing is, unlike queueing for your typical dungeon, PotD and HoH don’t care what your party composition is. This means that despite being a DPS, you’ll get the same speedy entry as a Tank or Healer.
While Deep Dungeons offer an alternative to typical dungeons and can be a super fun part of the game, it can feel more like a curse than a blessing with how many runs it would take to level a character to max. To help break up the monotony, try getting a group of friends together. It’ll be a lot more fun and feel less like you’re in the Seven Hells when you’re on your tenth run of floors 91-100.
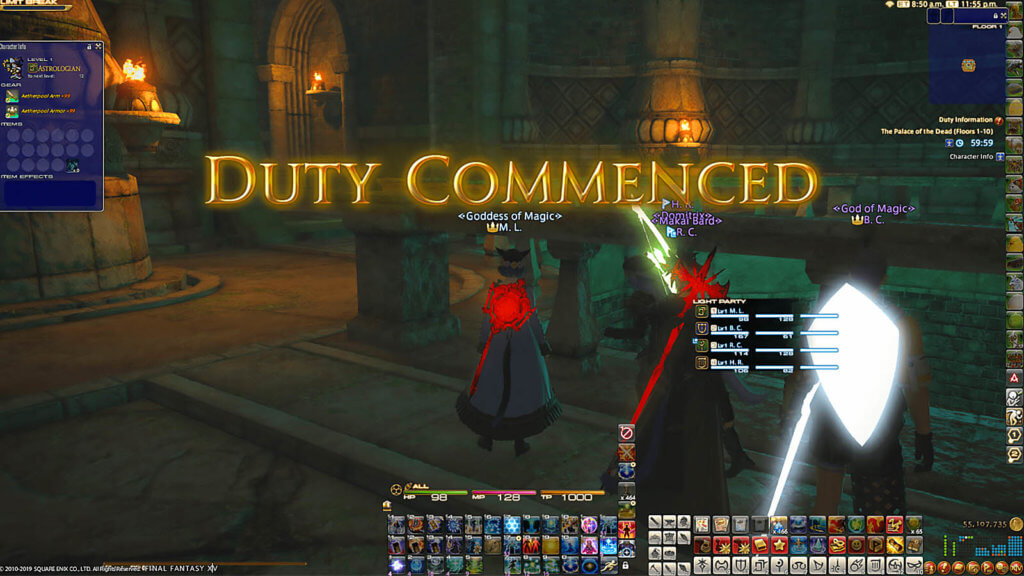
When you find yourself in the mood to play solo but you’re wanting to get through some quick levels, look into Levequests. Leves are repeatable quests that give a variety of rewards and can be found in almost every area, and each area has a level range associated with it. Keep in mind, you can’t do an infinite amount. Each character gains 3 leve allowances every 12 hours until they cap at 100. You can burn through all 100 in one sitting, just be aware it’ll take some time to build up more allowances.
If none of these stick out to you, try going through all of those Side Quests you left behind in favor of the MSQ, or work on getting all of your Beast Tribes to max reputation. There are a ton of side quests all over the place, and once you start them you might feel like there’s no end in sight. On the other hand, you can only do 12 Beast Tribe quests a day and they’re pretty quick and simple. Depending on what your mood is and how much time you have to kill, both of these are good options. You can also look under logs for your ‘Hunting Log.’a This is a list of enemies you should kill, and each class has its own list. This doesn’t take long to do and will give you a big boost of EXP each time you finish a page.
The only issue is that classes that are added with expansions do not get a Hunting Log, so for those of you leveling Dark Knight, Astrologian, Red Mage, or Samurai, this won’t be an option. However, the Challenge Log is open to every single job. This gives you a list of things to complete daily or weekly for extra rewards. Some of these will come naturally as you play the game –doing a certain amount of dungeons is an example– and others might need a little more planning. There are dozens of challenges to complete and plenty of experience to gain.
One more thing to keep in mind when leveling classes is that you don’t need to level them all up at the same time. Seriously, you don’t. I couldn’t tell you how many people I’ve come across that have all 14 jobs unlocked and within five levels of each other but haven’t gotten out of the 3.0 MSQ. Unless this is how you really want to play the game, you’re spending too much time worrying about having all the classes and not enough on finishing the MSQ, which is always, always, always the most important thing to do.
Feel free to try out a few classes when you get into the game to see what you like the most, but once you’ve picked your main, stick with it ‘til the end. The reason is that you get an EXP bonus for every level of difference between your highest class and the one you’re leveling. So if you’ve got Monk at 70 and you’re wanting to give Scholar a try, you’ll fly through those first twenty levels in a blink of an eye. The rest of the way to 70 won’t be bad, either.
Lastly, if you’re in a Free Company, don’t be afraid to ask your FC Leaders to activate Heat of Battle—which increases the amount of EXP you gain when killing enemies—if they don’t typically keep it up. One of the benefits of being in a FC is the buffs they have access to, so take advantage of it!
The Smith
At level 15, you’ll gain access to an NPC in all three main City-States named ‘The Smith.’ He gives you a series of instance battles that differ depending on which class you’re playing. These are very short and actually help you to not only learn your class (outside of your rotation), but also give you a very good idea of how basic dungeon mechanics work in the game. Even if you’re a veteran MMO-er, it’s still a good idea to go and listen to this guy. As a reward for finishing all of his “Baby’s First Dungeon” classes, The Smith gives you a set of really nice gear for your class, including a ring called Brand-New Ring. This sweet little thing will grant you an EXP bonus until level 31 while worn, and easily makes the time investment worth it.
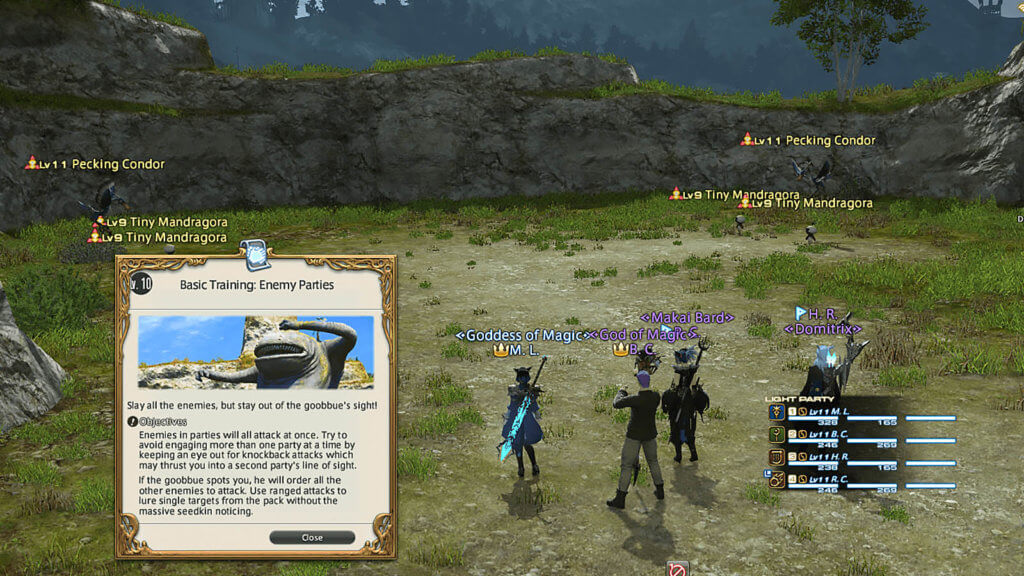
Guildhests
Guildhests are very similar to what The Smith sends you into: short little instanced fights with 4-8 other people that teach you how to successfully complete a dungeon. These are a tad bit longer and a lot more involved than what The Smith puts you in, but you get a nice EXP bonus for completing each one of these for the first time on each individual class. That means you should definitely work on these each time you pick up a new class or job, whether it’s your first or 15th that you’re leveling up.
Role Actions
While you get most of the moves you need just from leveling and doing your class quests, there is a group of 10 moves for each type of class that are really helpful for most classes, and a must-have for some. Some DPS classes can get away with not needing many of these moves (Diversion while playing Summoner is an example), but if you’re a Healer or a Tank, these are a must. If you’re a tank without Provoke, or a healer without Swiftcast, you’re going to catch some flak from your party members. Make sure to check these out by going to “Actions and Traits” and selecting “Role Actions” to make sure you’ve got all the moves for each of your classes.
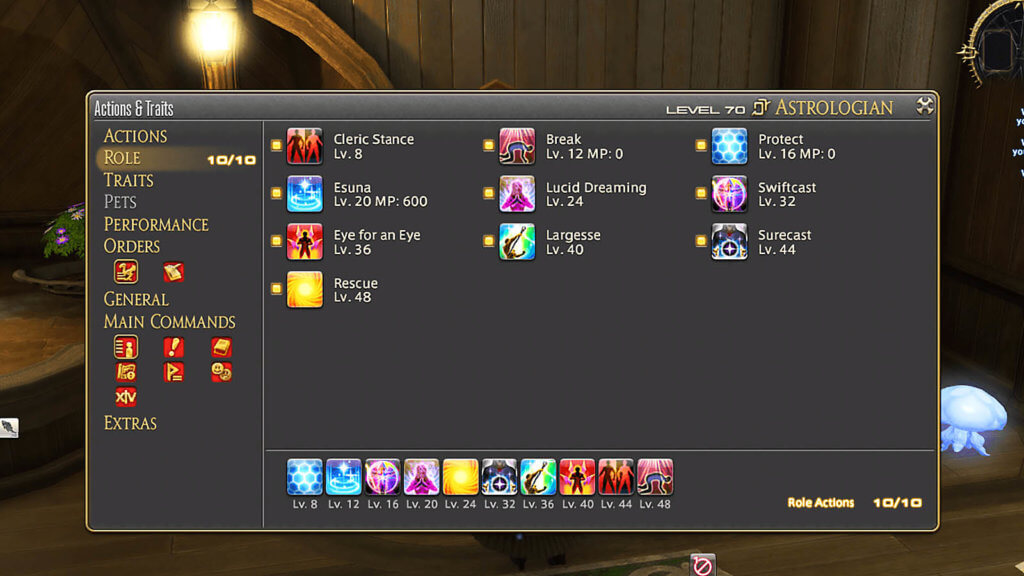
[Note: In the recent Letter from the Producer Live it was revealed that role actions are being replaced with a new and more intuitive system. When Shadowbringers releases on July 2nd, this will no longer be applicable.]
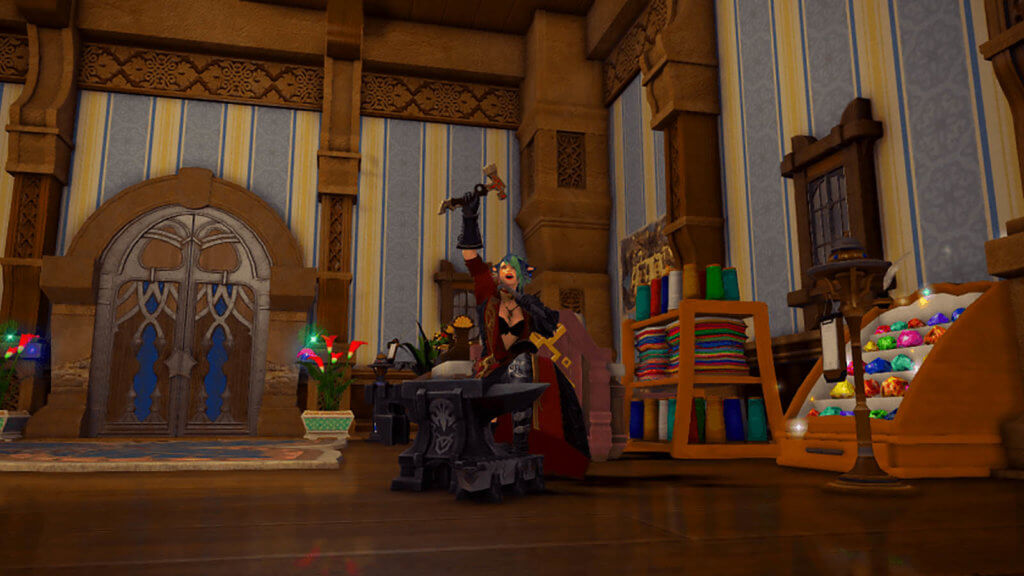
Crafting and Gathering
If you’re looking to make money in game, this is the way to do it. Unlike with Disciples of War and Magic classes, with Disciples of the Hand and the Land you should try to keep their levels even. While DotL classes don’t utilize this quite as much, DotH classes can ‘take’ moves from each other — similar to Role Actions. Each of the 8 crafters will have a handful of moves that the other crafters can add to their abilities, and some of these are required to make things easier. All of these classes also share the majority of their gear, so keeping them around the same level means you only need one set of gear between them.
If you’re interested in crafting and gathering in Final Fantasy XIV, I would recommend focusing on gathering first. The three gatherers also share gear, but that’s about the extent of the reasons to level them up together. Crafting can get expensive, and I mean insanely so. But by having all of your gatherers leveled up, you can harvest, mine, or fish up your own materials instead of spending a ton of gil on the marketboard.
Another useful thing with crafting and gathering classes is that they’ll also get an EXP buff for each level difference between their level and your highest Disciple of War or Magic class!
HUD and UI
For those of you that aren’t used to MMOs, here’s some good news: you can change everything on your screen. Don’t like your health bar where it is? Want to make your chat box bigger? Literally everything you see is customizable (and most of it can be hidden), and at one point or another you’ll want to dig into these options. I won’t go into a ton of details for this since most of it involves personal preference, but here are a few key points that you’ll need to know.
When you first start the game, you have two default hotbars (hotbars are those long lines of squares that hold your actions). Around level 50, you’ll find that two hotbars are not enough to hold everything and you’ll need to add a third. You can go into your HUD layout, select a hotbar, and move it where you want. Make sure to check which number it is because more than likely you’ll have to change its settings a tad for it to work.
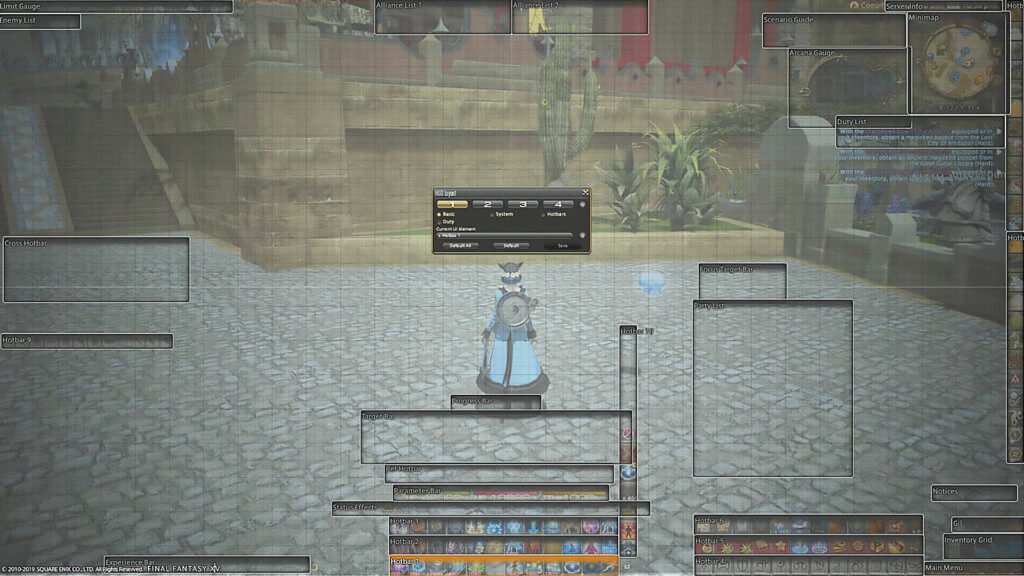
Once you’ve got it placed, go into Character Configuration and then Hotbar Settings. From here you can set it up to work as you want it. If you prefer it to be vertical or horizontal, 12×1 or 3×4, or shared between your jobs — you can do it all from here. Keep in mind, if it’s a hotbar that will be used for your job’s moves, you don’t want it to be shared. The only time you want a hotbar to be shared is if it holds things that each job needs access to.
For example, you can set up a hotbar to hold all of your jobs. This is a much easier way to switch between them than by going into your character sheet, selecting your gear sets (the gear you have equipped and saved to each job), and scrolling down until you find the one you want. All you have to do is find that gear set, then click and drag it onto your hotbar. You can do this with most things in the game, including mounts and minions, key items, and more. With all the customizations available in FFXIV, there’s no way you won’t find your own perfect setup.
Tricks
Cutscene Skipping
In every dungeon, you’ll have a short cutscene to watch when you first load in that shows a quick peek of what you’re about to be up against. There is also a short cutscene when you enter the final room where the boss is. While these may take anywhere from a handful of seconds to a couple of minutes, it gets old having to hit escape each time you want to skip one of these cinematics.
Luckily, the game knows you want the option to make this easier. Open “Character Configuration”, select the “General” tab, and scroll down until you see the section “Cutscene Skipping.” Just click the box that says “skip previously viewed scenario cutscenes” and voila! No more pesky button pressing during dungeons! You can also select this option for transportation cutscenes that play when taking a boat or an airship, and housing cutscenes that play when you enter The Goblet, The Lavender Beds, The Mist, and Shirogane.
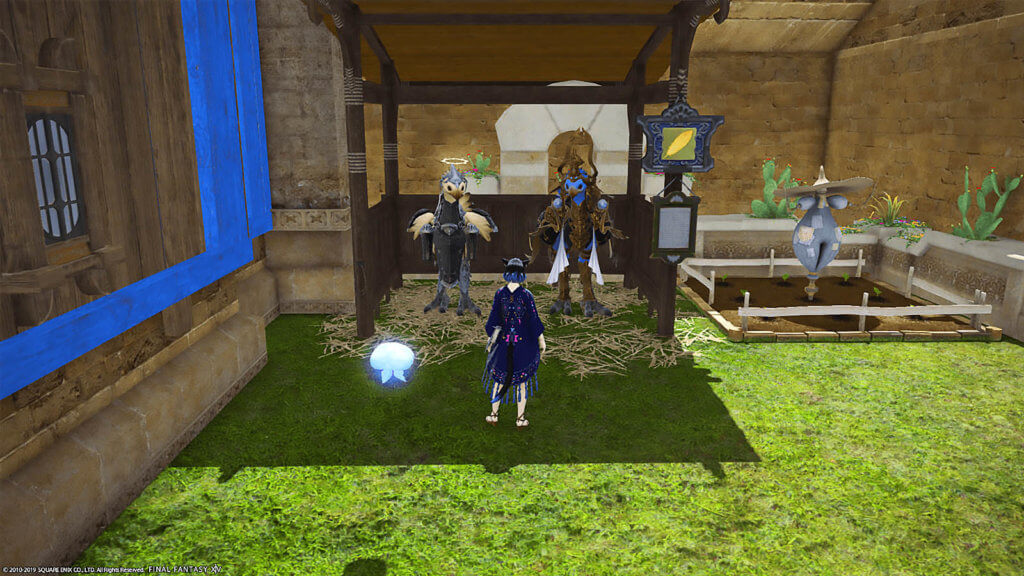
Chocobo Companion
Not only do you get a Chocobo as a mount, but it can also help you fight in the open world. One of those little blue quests with a plus sign found in Bentbranch Meadows in Central Shroud around level 30 will send you to help out a Chocobo breeder. If you do his chores for him, he’ll teach your cute little bird how to fight, heal, and defend. By using an in-game item (“Gysahl Greens,”f which are purchasable from vendors), you can summon your mount as a party member and have it help you fight your enemies. This also unlocks access to bardings, which are cute little outfits to dress your chocobo in!
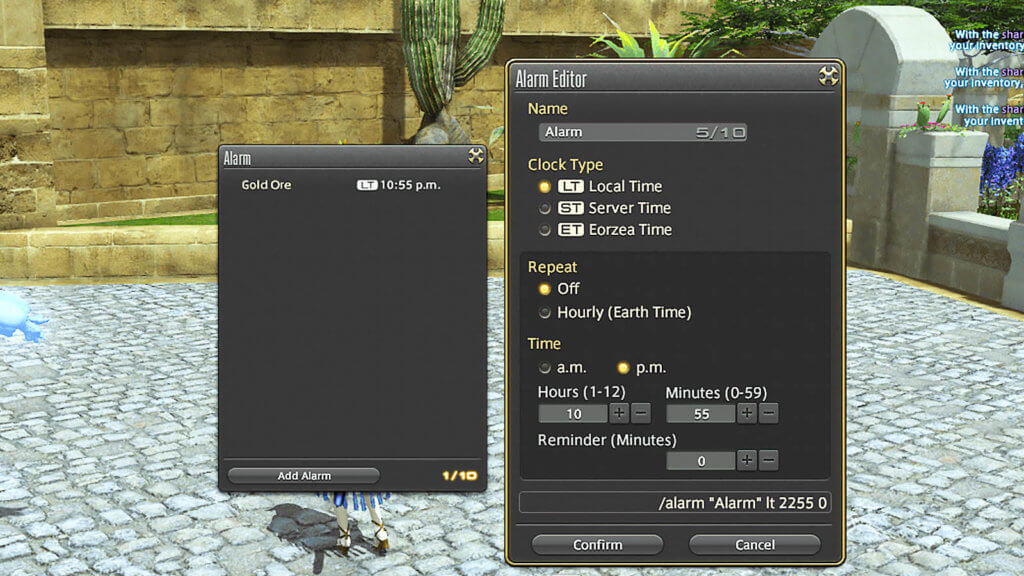
Alarms
This has easily been one of the best quality of life improvements for the game since I started playing. If you’re the type of person who can’t ever remember when a gathering node is about to pop, fret no more! Use the text command “/alarm” to pull up the alarm menu. From there you can set multiple alarms based on your local time, server time, or even Eorzean time! There are a few customization options for alarms and there’s no limit to what they can be used for. So if you need a reminder for when raiding starts, or even an alarm for when to take a pizza out of the oven, you’re covered.
PS4
Unless you have an attachable keypad for your PS4 controller, you’ll soon learn that trying to talk in any Final Fantasy XIV chat is one of the worst things imaginable. However, Sony made other options easy and viable. If you have a USB keyboard, just plug it in, hit the toggle switch at the top of the “Character Configuration” screen, and you’ll be good to go! No other set up is necessary. You can even use a Bluetooth keyboard if you’ve got one laying around, though these can get a little funky sometimes. Your options don’t end with a keyboard, though. You can also plug in any USB mouse, wired or wireless.
And to go even further, if you want to play with an MMO mouse, you can use those 12+ wonderful buttons, too. Just make sure your mouse has onboard memory. Older Razer Naga mice, as well as the Logitech G600 mouse, are examples of this. If you decide to go back to using a controller, you can switch back at any time by pressing that toggle switch again.
Profanity Filter
The game has a default setting turned on to replace all profane language with ????. If you don’t want to see this type of language then you’re all set! If you like to know everything that’s said, you can go into “Character Configuration” and toggle this off, thereby allowing your eyes to see all the raunchiness other players have to offer.
Rendering Issues
Are you experiencing some crazy lag while in a heavily populated area, or when fighting a tough world enemy? “I’m looking at you, Odin.” Good news: there’s a way to make that a little less annoying. In “Character Configuration” you can turn down or completely turn off other players’ visual effects. By toning these graphics down, your PS4 or PC should be able to handle the insane amount of people around you better, and you’ll actually be able to see the mechanics that kept plaguing you. [Pro tip: This is basically a must if you’re going into Eureka.]
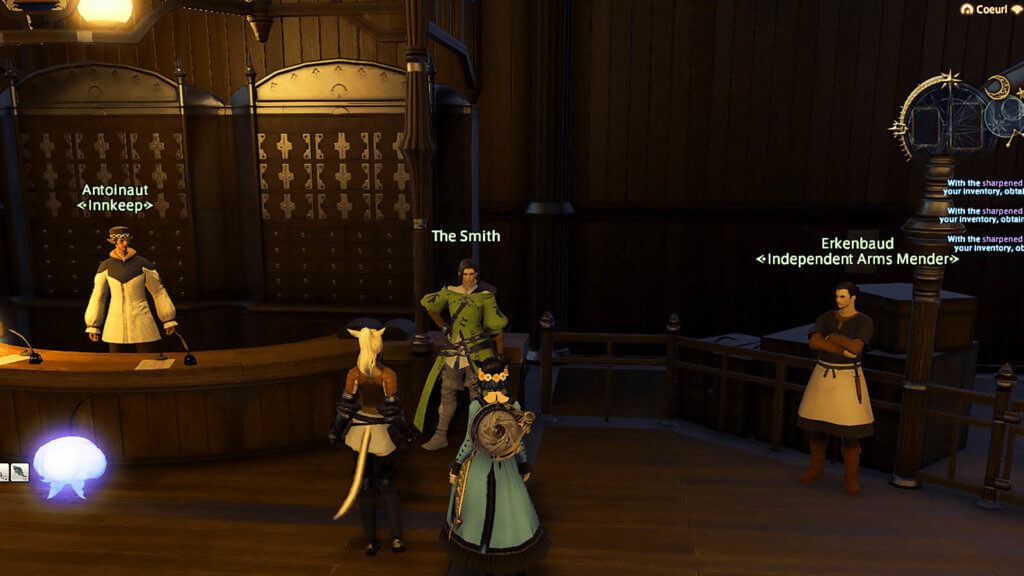
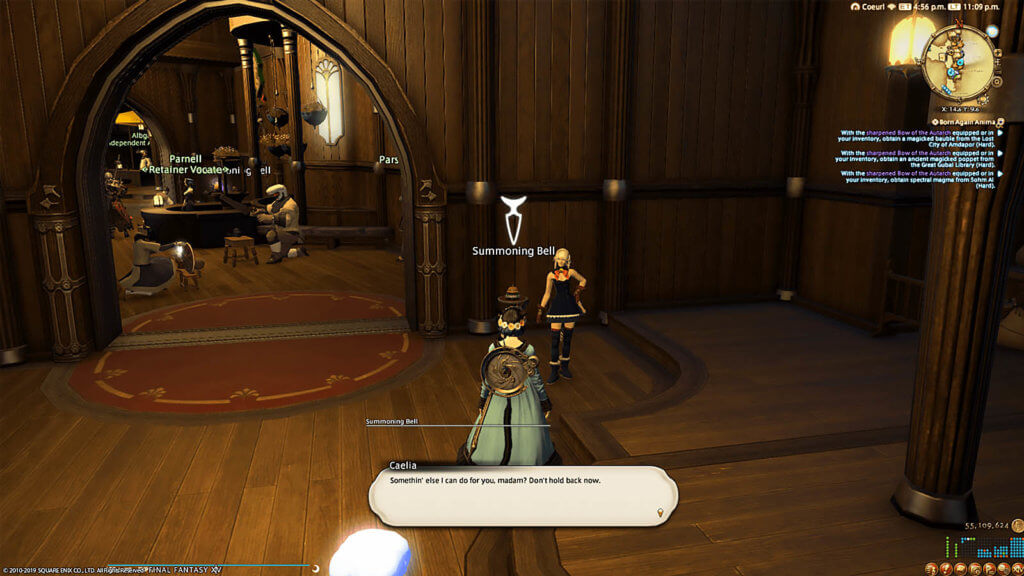
Retainers
When you get around level 17 and complete certain requirements, you’ll be able to hire your first retainer. A retainer is an NPC whose appearance and attitude you can customize, and which you can interact with via the use of a Summoning Bell. These guys will become your best friends. Once you’ve created them, you can assign them a class and send them out on ventures, or use them to store and sell items on the market board. Ventures can last either an hour or 18 hours depending on what kind you send them on. Retainers can bring back some pretty cool and rare items by doing these ventures, and what they can bring depends on what class you assign them.
While they can be any DoW, DoM, or DotL class, they cannot do two things: become a class that your character has not unlocked, and surpass the level your character has hit on that same class. So if you have Botanist at level 42 and you make your retainer a Botanist, they cannot level up past 42 until you do. Think of them as your students that can never become the master.
Teleporting
The first thing you should do whenever you get to a new area is attune to the local Aetheryte crystal. These are the giant blue glowy things that are super hard to miss, and if you’re in a city you’ll find some cute tiny ones to match. Attuning to the Aetheryte gives you access to teleport there for a small fee. Do not worry about this charge — the cost is small and the amount of time and frustration it saves you from having to use Sprint on cooldown through five zones is well worth it.
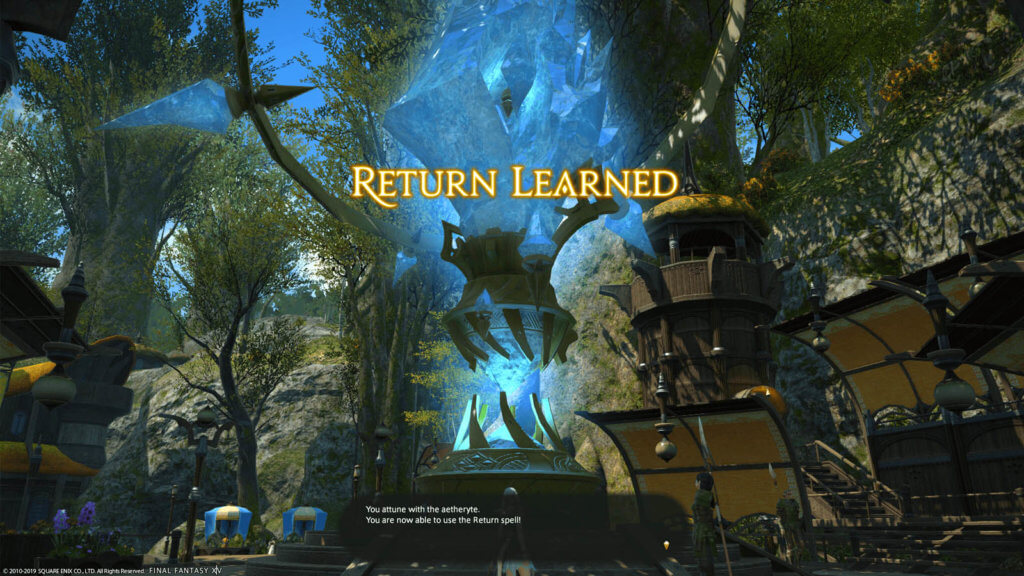
You’ll have the ability to set one Aetheryte as your ‘Home Point’, not only making this teleport free to use with the Return ability, but also setting that location as the spot you’ll resurrect should you die and not have a friend there to give you a Raise. You’ll also be able to set a few ‘Preferred Destination’ spots, making each teleport to that location cheaper. If you download the FFXIV Companion App (which is free) and/or set up a one-time secondary password, you’ll get an extra ‘Preferred Destination’ teleport for each. Take advantage of the app at the very least. It’ll really come in handy!
Big thank you to our supporters
From their continous support, we are able to pay our team for their time and hard work on the site.
We have a Thank-You page dedicated to those who help us continue the work that we’ve been doing.
See our thank you page